How to Make Your Own Hat at Home: DIY Guide
Hats have been a fashion staple for centuries, serving both functional and stylish purposes. Whether you need one for sun protection, to complete an outfit, or just for a creative outlet, making your own hat at home can be a rewarding and fun experience.We’ll walk you through the process of creating a variety of hats, from simple styles to more intricate designs. Not only will you have a custom hat made by your own hands, but you’ll also gain new crafting skills along the way.
Why Make Your Own Hat?
Before diving into the actual process, let’s discuss why making your own hat can be a great idea. Here are a few reasons:
- Customization: You can design a hat that matches your personal style and preferences. Choose the fabric, color, and details that reflect your personality.
- Cost-effective: Buying high-quality hats can sometimes be expensive, especially if you want something unique. Making your own is a more affordable option.
- Satisfaction: There’s a special feeling of pride that comes with crafting something yourself. Whether it’s for yourself or as a gift, creating a hat can be immensely satisfying.
- Sustainability: By making your own hat, you can repurpose old fabrics or materials, reducing waste and contributing to a more sustainable fashion practice.
Now that we understand the benefits, let’s jump into the step-by-step process of making your own hat!
Materials You Will Need
Before you start, it’s essential to gather the materials you’ll need to make your hat. Here’s a list of basic supplies:
- Fabric: Felt, wool, cotton, or linen are popular choices, but feel free to experiment with different textures and types of fabric depending on the type of hat you want to make.
- Hat Pattern: You can find many free downloadable patterns online or create your own if you prefer. If you are new to hat-making, using a pattern can help simplify the process.
- Hatband: You can use ribbon, fabric strips, or leather bands, depending on your desired look.
- Scissors: Sharp fabric scissors are essential for clean cuts.
- Needle and Thread: If hand-sewing, ensure you have strong thread. A sewing machine can also speed up the process.
- Glue Gun or Fabric Glue: For securing certain parts of the hat.
- Elastic or Adjustable Band: This will help ensure the hat fits comfortably on your head.
- Iron: For pressing fabric and ensuring crisp edges.
- Decorative Details (Optional): Feathers, beads, flowers, or buttons can be added for a personalized touch.
Types of Hats You Can Make
When making a DIY hat, there are several different styles to choose from. Here are a few options you can try:
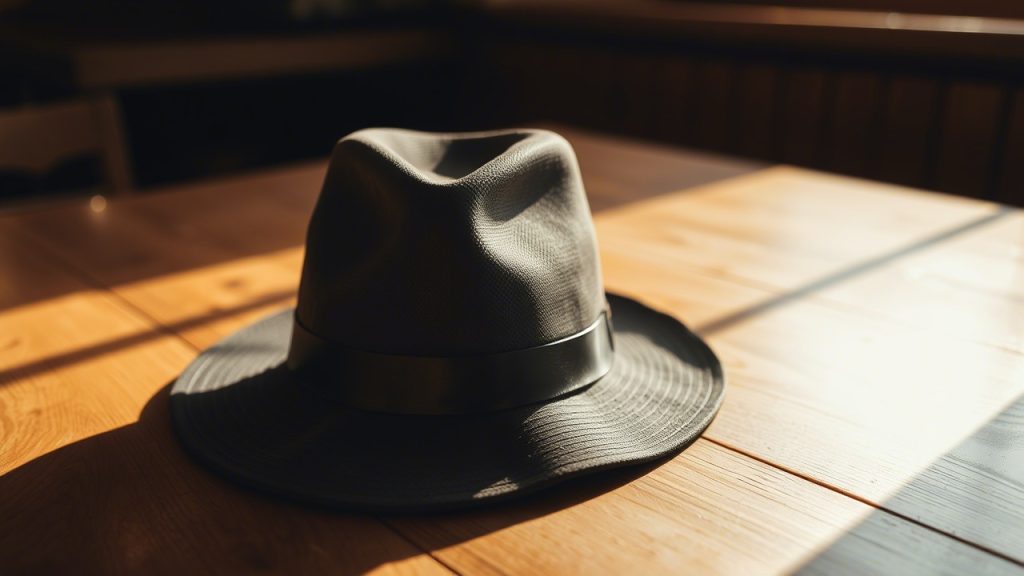
- Fedora: A classic style with a wide brim and a pinched front. It’s perfect for a stylish, casual look.
- Bucket Hat: A soft, floppy hat with a wide, downward-sloping brim. This hat is great for sunny days and casual outfits.
- Beret: A simple, rounded, flat hat often associated with French fashion. It’s easy to make and gives off a chic vibe.
- Wide-brimmed Sun Hat: Perfect for outdoor activities, this hat offers sun protection and is stylish at the same time.
- Beanie: A knit hat that’s cozy and functional, great for colder months.
- Bowler Hat: A structured hat with a rounded crown and short brim, popularized in the Victorian era.
Once you have your materials and style chosen, it’s time to get started!
Step-by-Step Guide: How to Make a Fedora Hat
Let’s start with a simple, classic fedora. Follow these steps to make your own at home:
Step 1: Create or Find a Pattern
Begin by finding a pattern for a fedora hat. If you want, you can create your own pattern by tracing the shape of the crown and brim. Typically, the crown will be about 4 to 5 inches tall, and the brim will be about 2 to 3 inches wide.
Step 2: Cut the Fabric
Once you have your pattern, use scissors to cut out the pieces. You’ll need to cut a strip for the crown, a piece for the brim, and a band for the base of the crown.
Step 3: Shape the Crown
For the crown, take the strip of fabric and roll it into a cylinder shape. Pin it into place, ensuring that the seam is at the back. If you’re working with stiff fabric, you may need to apply a bit of fabric stiffener to help it hold its shape. Sew or glue the fabric together along the seam.
Step 4: Attach the Brim
Next, attach the brim to the base of the crown. Fold the edges of the brim fabric under to create a clean edge, and pin the brim to the bottom of the crown. Sew it securely into place, making sure the brim sits evenly around the entire circumference.
Step 5: Add the Hatband
Use a strip of fabric or ribbon to create a hatband. This will be placed around the base of the crown, covering the seam where the crown and brim meet. Secure the band with fabric glue or stitch it in place.
Step 6: Finishing Touches
To complete your fedora, add any decorative elements you like, such as feathers, buttons, or a small bow. These can be attached using fabric glue or hand-sewing. Give the hat a final press with the iron to ensure it retains its shape.
Step 7: Adjust the Fit
If needed, you can add an elastic or adjustable band to the interior of the hat to ensure a snug fit. Measure the circumference of your head and adjust the size accordingly.
Now you have a custom-made fedora that’s all your own! This process can be easily adapted to other types of hats, such as a bucket hat or beret.
Step-by-Step Guide: How to Make a Simple Bucket Hat
If you prefer something more casual, a bucket hat is an easy DIY project that doesn’t require too many materials or advanced sewing skills. Here’s how to make one:
Step 1: Create or Find a Pattern
A bucket hat consists of a crown (the top part) and a brim. Draw a pattern by tracing the shape of the crown and brim. You can use an existing hat to trace or find patterns online. Make sure to include extra fabric for seam allowances.
Step 2: Cut the Fabric
Cut out the fabric pieces for the crown and brim. You’ll need two pieces for the crown (a top and a side) and one or two pieces for the brim. Cut them according to your pattern, ensuring the fabric has enough room for seams.
Step 3: Sew the Crown
Sew the side pieces of the crown together to form a cylindrical shape. Then, sew the top piece to the cylindrical shape, ensuring everything is securely attached.
Step 4: Attach the Brim
Sew the brim pieces together and attach them to the bottom of the crown. You can choose to create a soft or stiffer brim, depending on your preference. If you’d like a firmer brim, use a fabric stiffener or interfacing.
Step 5: Add the Hatband
For extra flair, you can add a hatband around the crown. This can be a fabric strip or a decorative ribbon. Attach it to the base of the crown, covering any seams.
Step 6: Final Touches
Once you’ve finished the construction of the hat, give it a final press with an iron to smooth out the edges. You can also add embellishments like embroidered designs, small patches, or a colorful button to make it unique.
Step 7: Fit Check
Try the hat on to make sure it fits. If necessary, you can adjust the size of the hatband or add an adjustable elastic band to improve the fit.
9 Frequently Asked Questions
1. Can I make a hat without a sewing machine?
Yes, you can make a hat by hand-sewing or using fabric glue. Many simple designs, such as berets or bucket hats, can be sewn by hand if you don’t have a sewing machine.
2. What materials are best for making hats?
Felt, wool, cotton, linen, and canvas are popular fabrics for hat-making. Choose materials based on the type of hat you want to create (e.g., wool for winter hats, cotton for summer hats).
3. Do I need a pattern to make a hat?
Using a pattern is helpful, especially for beginners, as it guides you through the process. However, if you are experienced, you can create your own pattern by tracing an existing hat or measuring your head.
4. How can I make sure my hat fits correctly?
Make sure to measure the circumference of your head and adjust the pattern size accordingly. You can also add an adjustable band or elastic to the inside of the hat for a better fit.
5. Can I add decorations to my homemade hat?
Yes! Adding feathers, ribbons, flowers, buttons, or other embellishments is a great way to personalize your hat and make it unique.
6. How can I make my hat stiffer?
To add structure to your hat, use fabric stiffener or interfacing. Spray or brush the stiffener onto the fabric, then let it dry according to the manufacturer’s instructions.
7. What’s the easiest type of hat to make?
A simple bucket hat or beret is one of the easiest styles to make. These require minimal sewing skills and can be completed quickly.
8. Can I use recycled fabric to make a hat?
Absolutely! Recycled fabrics from old clothing, like denim or sweaters, can be used to make hats. This is a great way to repurpose materials and create something unique.
9. How long does it take to make a hat?
The time it takes to make a hat depends on the complexity of the design and your sewing skills. Simple hats can be made in just a few hours, while more intricate designs may take longer.
Conclusion
Making your own hat at home is not only a creative and enjoyable project but also a great way to express your personal style. Whether you’re crafting a fedora, bucket hat, or beret, this DIY guide will help you create a custom hat that fits perfectly and reflects your unique taste. With a little practice, you can experiment with different fabrics, designs, and embellishments to create a collection of handmade hats for any occasion.


