How to Make a Bra Strap Bracelet
Crafting accessories from everyday materials is not only a fun and creative activity but also a sustainable way to repurpose items that might otherwise go to waste. One such unique and stylish creation is the bra strap bracelet. This guide will walk you through the process of making your own bra strap bracelet, from gathering materials to the final touches, and will include tips, tricks, and frequently asked questions to ensure your crafting experience is enjoyable.
What is a Bra Strap Bracelet?
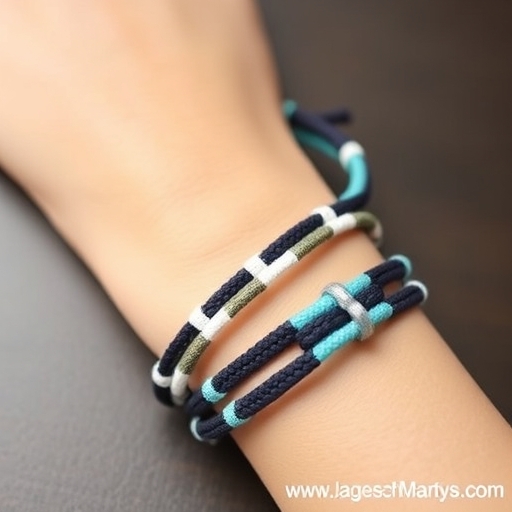
A bra strap bracelet is a fashionable accessory made from the straps of an old bra. It is an innovative way to recycle and upcycle materials that would typically end up in the trash. Not only does this project promote sustainability, but it also allows for a personalized touch, as you can customize the colors, lengths, and embellishments of your bracelet.
Why Make a Bra Strap Bracelet?
Creating a bra strap bracelet comes with several benefits:
- Sustainability: Reduces waste by repurposing old bras.
- Customization: Allows for personal expression through colors and designs.
- Cost-Effective: Utilizes materials you already have, saving money on new accessories.
- Fun Activity: Engaging and creative process, perfect for crafting enthusiasts.
- Old bras: Look for ones with interesting colors or patterns.
- Scissors: For cutting the straps.
- Beads or charms: Optional, for embellishments.
- Clasp or closure: Choose a type that suits your style (e.g., lobster clasp, magnetic closure).
- Needle and thread: For sewing on beads or securing straps.
- Measuring tape: To ensure the right length for your wrist.
- Measure your wrist: Use a measuring tape to find the circumference of your wrist.
- Cut the straps: Cut them to the desired length, adding an extra inch for adjustments and securing the ends.
- Choose your embellishments: Select beads or charms that complement your bra strap colors.
- Thread the beads: If you want to create a beaded design, thread the beads onto the strap before securing the ends.
- Secure the beads: Use knots or stitches to hold the beads in place.
- Color Coordination: Choose bra straps that match or complement your favorite outfits.
- Mix and Match: Don’t be afraid to combine different styles and colors for a bold look.
- Experiment with Lengths: Try varying lengths for a layered effect.
- Use Quality Materials: Ensure that the straps and clasp are durable enough for everyday wear.
Materials Needed
Before you start crafting, gather the following materials:
Step-by-Step Guide to Making a Bra Strap Bracelet
Step 1: Prepare Your Workspace
Set up a clean, comfortable workspace with all your materials within reach. Good lighting will help you see your work clearly, making it easier to cut and assemble your bracelet.
Step 2: Choose Your Bra Straps
Select the bra straps you want to use. Look for straps that are in good condition and have a design that appeals to you.
Step 3: Cut the Straps
Using scissors, carefully cut the bra straps from the main body of the bra. You can use one strap for a simple bracelet or combine multiple straps for a layered look. Here’s how to measure:
Step 4: Attach the Clasp
To create a functional bracelet, you’ll need to attach a clasp. Here’s how to do it:
1. Create loops: Fold the ends of the bra straps to create small loops.
2. Sew the loops: Use a needle and thread to secure the loops. Make sure they are strong enough to hold the weight of the bracelet.
3. Attach the clasp: Sew or loop the clasp onto the secured ends of the bra straps.
Step 5: Add Embellishments (Optional)
If you want to add some flair to your bracelet, consider embellishing it with beads or charms. Here’s how:
Step 6: Final Adjustments
Try on your bracelet and make any necessary adjustments. If it’s too tight or loose, you can trim the straps or adjust the clasp.
Step 7: Enjoy Your Creation!
Your bra strap bracelet is now complete! Wear it proudly or gift it to a friend. This unique accessory is sure to spark conversations and admiration.
Tips for Making the Perfect Bra Strap Bracelet
Comparison Table: Different Types of Bracelets
| Bracelet Type | Material Used | Customization Options | Difficulty Level | Typical Cost |
|---|---|---|---|---|
| Bra Strap Bracelet | Old bra straps | Colors, beads, charms | Easy | Low |
| Beaded Bracelet | Beads, string | Colors, patterns | Medium | Medium |
| Leather Bracelet | Leather strips | Colors, designs | Medium | High |
| Fabric Bracelet | Fabric scraps | Patterns, colors | Easy | Low |
Frequently Asked Questions (FAQ)
Can I use any type of bra strap?
Yes, you can use any type of bra strap, but it’s best to choose ones that are in good condition and have a design that you like. Adjustable straps can also add versatility to your bracelet.
How do I clean the bra straps before using them?
You can hand wash the bra straps with mild soap and water. Allow them to air dry completely before starting your project.
Can I make a matching set of accessories?
Absolutely! You can create matching earrings or necklaces using the same bra straps or complementary materials.
What if I don’t have old bras?
If you don’t have old bras, you can visit thrift stores or check with friends and family to find some that they no longer use.
How do I ensure my bracelet is the right size?
Before securing the clasp, try on the bracelet to check the fit. Adjust the length as needed to ensure comfort.
Conclusion
Making a bra strap bracelet is not only a fun and creative project but also a fantastic way to promote sustainability in fashion. By using materials you already have, you can create a unique accessory that reflects your personal style. Follow the steps outlined in this guide, and you’ll have a stylish, eco-friendly bracelet in no time! Whether you’re crafting for yourself or as a gift, the bra strap bracelet is sure to be a hit. Happy crafting!