How to Customize Your Roller Skates: A Complete DIY Guide
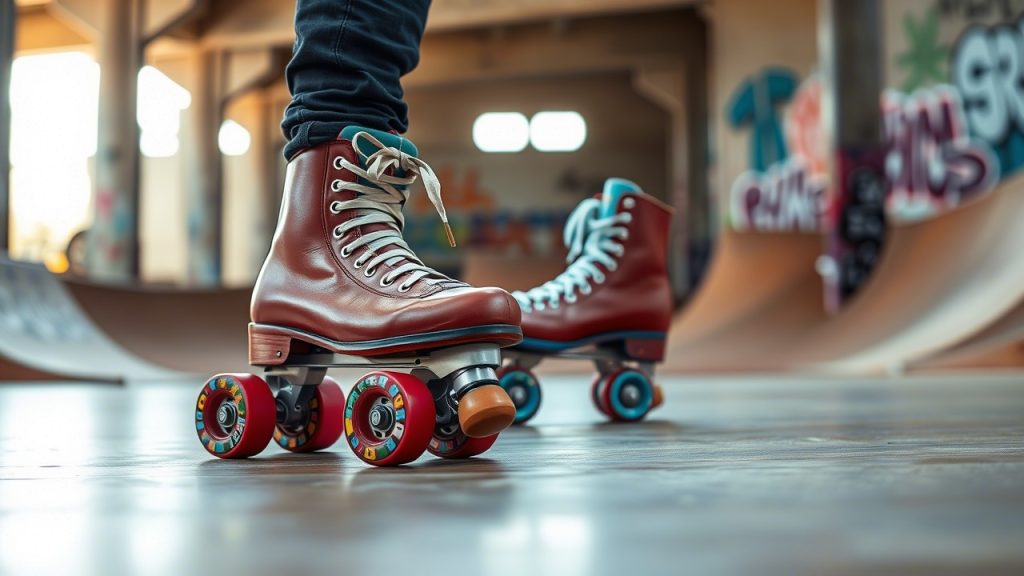
Roller skating is more than just a fun activity it’s a way of expressing your unique personality, style, and creativity. Whether you’re an experienced roller skater or a beginner looking to add some flair to your skates, customizing your roller skates can transform them into something truly unique. Not only does customization help you stand out, but it also ensures that your skates reflect your individuality.
We’ll walk you through how to customize your roller skates, from selecting the right parts to adding personal touches and designing your dream skates. Whether you’re looking to change the look, enhance performance, or both, we have you covered. Let’s get started!
Why Customize Your Roller Skates?
Customizing your roller skates can benefit you in several ways. Here are just a few reasons why you might want to dive into a DIY roller skate customization project:
- Personal Style: Customization allows you to express your creativity and personal style. You can go with a bold, colorful look or keep it sleek and understated—there are no limits!
- Performance Enhancement: Certain upgrades can improve the performance of your skates. For instance, better wheels, cushions, and bearings can make your skating smoother and more enjoyable.
- Comfort: Customizing your roller skates can also enhance the comfort level. Soft, cushioned insoles or padded socks will help prevent blisters and discomfort during long skating sessions.
- Fun and Satisfaction: There’s something incredibly satisfying about creating something unique and customized to your liking. Plus, it’s a fun and rewarding DIY project.
Step 1: Gather Your Materials
Before you begin customizing your roller skates, you’ll need to gather the necessary materials. The specific items will depend on the type of customization you’re doing, but here’s a general list of what you may need:
Materials for Aesthetic Customization:
- Paint or Spray Paint: Use high-quality, durable paint (acrylic or fabric paint works best for skates) for adding color or creating designs.
- Decals, Stickers, or Patches: To add personality and style to your skates.
- Rhinestones, Glitter, or Gems: For a sparkle effect and to add some glam.
- Lace, Ribbon, or Leather: To replace standard laces with something more unique.
- Markers or Paint Pens: For detailed designs or adding your own illustrations to the skate boot.
- Fabrics or Upholstery Material: If you’re looking to customize the inner lining or outer look of the boot.
Materials for Performance Customization:
- Replacement Wheels: Choose wheels suited for the surface you’ll be skating on (indoor vs. outdoor).
- Bearings: Swapping out the bearings can improve your speed and ride quality.
- Toe Stops or Jam Plugs: Depending on your preference for stopping or performing tricks.
- Cushions or Bushings: Soft or firm cushions can adjust your ride and control.
- Skate Tool: A necessary tool to remove and replace wheels, bearings, and other parts.
Optional:
- Shoe Cleaner: To clean the boots before starting the customization process.
- Clear Coating/Sealer: To ensure your designs and colors last over time.
Once you’ve gathered everything, you’re ready to dive into the customization process!
Step 2: Clean and Prep Your Skates
Before making any changes, you must ensure your skates are clean. Any dirt, grease, or grime can interfere with the paint, glue, or other customization materials, so give your skates a good cleaning.
Here’s how to prep your roller skates for customization:
- Remove the Wheels and Bearings: Use a skate tool to carefully remove the wheels and bearings from the boot. If you’re only working on the boot, you can skip this step.
- Clean the Boots: Wipe down the surface of the skate boots with a damp cloth. If they’re especially dirty, use a cleaner appropriate for the material (leather, fabric, etc.) and let the boots dry completely before proceeding.
- Clean the Wheels and Bearings: If you’re planning on upgrading your wheels or bearings, clean them thoroughly before reinstalling. You can use a bearing cleaner or an old toothbrush to scrub off any dirt or dust.
Step 3: Aesthetic Customization (The Fun Part!)
Now comes the exciting part—making your skates uniquely yours! Here are several ways you can personalize your roller skates for a one-of-a-kind look.
1. Painting Your Skates
Painting your skates is one of the easiest and most effective ways to make them stand out. Whether you want a solid color or intricate designs, painting allows for endless possibilities.
- Prep the Surface: If you’re painting leather or vinyl, make sure to lightly sand the surface with fine-grit sandpaper to help the paint adhere better.
- Choose Your Paint: Opt for acrylic leather paint or fabric paint, as these are designed to be durable and flexible. Avoid regular craft paints, as they may crack over time.
- Apply the Paint: Use a brush, sponge, or spray paint to apply the paint in thin layers. Allow each layer to dry before applying the next. Consider using painter’s tape to create clean lines or sections.
Read More: The History of Roller Skating: From 18th Century to Modern Times
2. Add Stickers, Decals, or Rhinestones
For a quicker aesthetic upgrade, adding decals, stickers, or rhinestones can instantly elevate your skates. You can choose from pre-made designs or even create your own using a Cricut machine.
- Stickers/Decals: Make sure the surface is clean before applying these. Stickers are a great way to show off logos, fun patterns, or positive messages.
- Rhinestones: Add sparkle by gluing rhinestones or gems to the boots. You can create patterns or even form words.
3. Custom Laces and Ribbons
Replace the standard skate laces with something more unique. Whether you prefer glittery laces, satin ribbons, or even leather laces, this is a small change that can have a big impact.
- Lace Tips: For an added touch, you can also replace the lace tips with cute charms, beads, or decorative ends.
4. Personalized Boot Lining
If you’re feeling particularly crafty, you can customize the interior lining of the skate boots. By sewing in a unique fabric or adding extra padding, you can add both style and comfort to your skates.
- Materials: Soft fabrics, fur lining, or memory foam are excellent for comfort customization. You can use fabric glue to secure the fabric in place.
5. Spray Glitter or Glow-in-the-Dark Paint
Want to make a statement at night? Consider using glow-in-the-dark paint or glitter spray on your skates. This will give them a magical effect under black lights or in the dark!
Step 4: Performance Customization (Functionality Matters)
While the aesthetic customization is fun, performance is also crucial for a smooth and enjoyable skating experience. Here are some performance-based upgrades you can make to your roller skates.
1. Wheels
The type of wheels you use has a huge impact on how your skates perform. The hardness of the wheel determines its grip, speed, and smoothness on various surfaces.
- Indoor Wheels: Softer wheels (78A to 85A) provide better grip on smooth surfaces like indoor rinks.
- Outdoor Wheels: Harder wheels (88A to 101A) are best for rougher, outdoor surfaces.
Upgrading your wheels can improve both comfort and performance, so choose the right ones based on where you plan to skate.
2. Bearings
Bearings are essential for keeping your wheels rolling smoothly. Swapping out the factory-installed bearings for high-quality ones can make a big difference in speed and smoothness.
- Lubrication: Over time, bearings can accumulate dirt, so make sure to clean and lubricate them regularly for maximum performance.
3. Bushings and Cushions
The bushings and cushions in your skates control how responsive your ride is. You can adjust these depending on your skating style.
- Soft Bushings: Provide a more responsive feel, which is ideal for tricks and speed skating.
- Firm Bushings: Offer better stability and control, making them better for beginners or those who need more balance.
4. Toe Stops or Jam Plugs
Your toe stops (or jam plugs if you’re into artistic skating) can be customized based on how you skate. If you’re doing a lot of speed skating, you may prefer smaller, more streamlined toe stops. Alternatively, larger ones are useful for stopping quickly in a derby setting.
Step 5: Final Touches
After all the major work is done, add some final touches to ensure your skates look great and function perfectly.
- Clear Coat: Apply a clear coat or sealer to protect your paint and designs from chipping or fading over time.
- Check Performance: Before taking your skates for a test run, make sure everything is properly tightened and assembled.
Once you’ve completed your DIY customization, you’re ready to hit the rink or the streets in style!
Frequently Asked Questions
1. How long will my custom paint job last?
It depends on the type of paint used and how well you maintain your skates. If you use high-quality leather paint and apply a protective clear coat, your paint job should last a long time. Regular maintenance, such as cleaning the skates properly, will also help maintain the paint.
2. Can I customize my roller skates if they’re made of leather?
Yes! Leather is a great material to customize, and you can use fabric paint or leather paint for customization. Just make sure to clean and prepare the surface before painting.
3. What is the best way to clean roller skates before customizing them?
Use a damp cloth to remove dirt and grime. For deeper cleaning, use a cleaner specific to the material of your skates (leather or fabric). Always let the skates dry completely before starting your customization project.
4. Do customizations affect the performance of my skates?
Aesthetic customizations such as paint and decorations won’t impact performance unless they are heavy or interfere with the functionality of the skate. However, performance upgrades like new wheels, bearings, and cushions can significantly enhance your skates’ functionality.
5. How can I make sure my roller skates are comfortable?
Customizing the insoles or adding padding to the boots can improve comfort. Look for soft, cushioned insoles, or even try adding a layer of memory foam for extra comfort.
6. Can I add rhinestones to my roller skate wheels?
Yes! Adding rhinestones to the sides of your wheels can be a fun and flashy way to personalize them. Just make sure to secure them with strong adhesive, so they stay in place while skating.
7. What’s the easiest way to upgrade my roller skates?
The easiest way to upgrade your roller skates is by changing out the wheels and bearings. These are simple swaps that can improve both performance and the overall skating experience.
Conclusion
Customizing your roller skates is a fun, creative, and rewarding way to make your skates truly yours. Whether you’re adding style with paint, glitter, and stickers or improving performance with new wheels, bearings, and cushions, the possibilities are endless. With the right materials and a little bit of time and effort, you can create roller skates that look great, feel comfortable, and perform well.
So, grab your skate tools and get started on your DIY roller skate customization project today!
Suggest Tools