Installing an in-ground basketball hoop is one of the best ways to bring the excitement of the game right into your own backyard. It provides a stable, professional-quality setup that makes it easier for players of all ages and skill levels to enjoy the game. Installing a basketball hoop requires careful planning, the right tools, and a good amount of hard work to ensure that the hoop stands the test of time.
If you’re ready to install your in-ground basketball hoop, this guide will walk you through each step of the process. Whether you’re a seasoned DIYer or a first-timer, we’ll cover everything you need to know, from preparing the site to assembling the hoop and ensuring it’s installed securely.
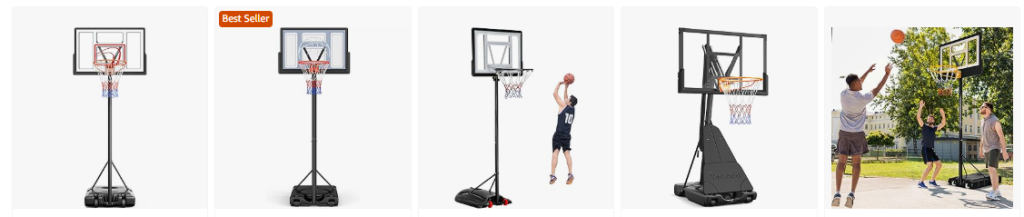
Looking for the perfect fit? Check out these Best-Selling basketball hoops.
Step 1: Choose the Right Location
Before you dive into digging holes and assembling parts, the first thing you need to do is pick the right location for your hoop. The position of your basketball goal is critical because it affects the gameplay experience, as well as the hoop’s durability. Consider the following factors:
- Flat and Level Surface: Ideally, your basketball hoop should be placed on a flat and level surface. A sloped or uneven area can cause stability problems, affecting the hoop’s ability to stay upright and secure.
- Distance from Other Objects: Make sure there’s enough space around the hoop to allow for safe play. The hoop should be positioned away from fences, trees, buildings, or any other obstacles that could interfere with the game. A typical basketball court size is 28 feet by 50 feet, but the actual space you need may depend on how much room you want for players to move around.
- Sunlight and Wind: If possible, consider the direction of the sun and how it might affect visibility during games. Additionally, keep in mind the wind patterns in your area. High winds can affect the stability of the hoop, so positioning the goal in a location that is shielded from strong gusts is important.
Step 2: Gather the Necessary Tools and Materials
Once you have the perfect spot, you’ll need to gather all the necessary materials and tools before beginning the installation. Here’s a list of what you’ll need for the job:
Tools:
- Shovel (or post hole digger)
- Level
- Tape measure
- Power drill with bits
- Wrench set
- Hammer
- Concrete mixing tools (if necessary)
- Safety gloves and eyewear
Materials:
- Basketball hoop system (post, backboard, rim, etc.)
- Concrete (usually around 4-6 bags for a typical installation)
- Gravel (for drainage at the bottom of the hole)
- Water (to mix with concrete)
- Asphalt patching compound (optional, if needed for leveling)
Step 3: Prepare the Installation Site
Once you have your location and materials ready, it’s time to prepare the installation site. This step involves digging the hole for the post, which is one of the most critical tasks of the entire process. You will need to dig a hole deep and wide enough to support the basketball hoop post securely.
Read More: Adjustable Basketball Hoops
Digging the Hole:
- Check the Depth and Size: Most in-ground basketball hoop systems require a hole that is 24–48 inches deep, depending on the size of the post and the type of hoop you’re installing. Refer to the manufacturer’s instructions for specific measurements.
- Mark the Location: Use spray paint or a marker to mark the center point where the hole will go. Make sure to use a tape measure to confirm that the hole is positioned at the right distance from fences or other structures.
- Excavate the Hole: Start digging with a shovel or a post hole digger, ensuring that the hole is straight and even. Dig the hole a little wider than the diameter of the post to allow room for the concrete to be poured around it. If the post is square, make the hole about 6 inches larger than the width of the post.
Drainage Considerations:
- It’s important to provide adequate drainage for the post to prevent water from pooling around it. This can cause rust, corrosion, and premature deterioration of the pole. Add a layer of gravel at the bottom of the hole (around 4–6 inches), which will help the water drain away from the post.
Step 4: Set the Post in Place
The next step is to place the post into the hole you’ve dug. This is a critical part of the process, as the post needs to be perfectly aligned to ensure that your basketball hoop is stable and level.
Position the Post:
- Insert the Post: Carefully lift the basketball hoop post and place it into the center of the hole. Have a helper hold the post in place while you check for level.
- Check for Vertical Alignment: Use a level to ensure that the post is perfectly vertical. This is extremely important to ensure the hoop is aligned and stable once the concrete cures.
Temporary Support:
- Use wooden braces or supports to keep the post stable and prevent it from shifting as you pour the concrete. You may need to brace the post at several angles to ensure it remains level throughout the curing process.
Step 5: Pour Concrete
With the post positioned and braced, it’s time to pour the concrete into the hole to secure the post in place. Make sure to use high-quality, fast-setting concrete mix, as this will give the post a solid foundation.
Mix the Concrete:
- Follow the manufacturer’s instructions on the concrete bag for the correct water-to-concrete ratio. If you have a large hole, you might want to mix the concrete in batches.
- Mix the concrete until it’s the consistency of thick mud, then begin filling the hole.
Pour the Concrete:
- Pour the concrete around the post, making sure it fills the entire hole. As you pour, use a shovel or stick to stir the concrete to eliminate air pockets.
- Once the hole is completely filled, use a trowel to smooth the top of the concrete and level it off with the ground. Leave a slight slope for water drainage away from the post.
Step 6: Let the Concrete Cure
Allow the concrete to set and cure properly. This is one of the most important steps, as rushing this process can result in an unstable hoop. Most concrete needs about 24-48 hours to set before you can continue with the assembly, but it can take up to a week for the concrete to fully cure. Check the manufacturer’s instructions for specific curing times.
Checking for Stability:
- After the concrete has set, gently test the stability of the post. It should feel firmly in place with no wobbling or shifting.
Step 7: Assemble the Basketball Hoop
Now that your post is securely in place, it’s time to assemble the rest of the basketball hoop. This step will vary depending on the model of the hoop, so always refer to the manufacturer’s assembly instructions for specific guidance.
Install the Backboard:
- Attach the backboard to the post using the included hardware. Ensure that the bolts are tightened securely and that the backboard is level.
Attach the Rim:
- The rim is the final part to be installed. Align the rim with the holes on the backboard and tighten the screws or bolts as directed in the instructions.
Step 8: Final Checks and Adjustments
Once the hoop is fully assembled, do a final check to ensure everything is tightened securely. Adjust the height if necessary (many in-ground basketball hoops allow for height adjustment), and test the hoop by gently pulling on the rim to ensure it’s sturdy.
Additionally, take one last look around the installation site to make sure there are no obstacles or hazards around the hoop.
Step 9: Enjoy Your New Basketball Hoop!
Now that your hoop is installed, it’s time to enjoy hours of fun playing basketball with friends and family! Whether you’re shooting hoops, practicing layups, or running full-court games, you can now appreciate the fruits of your labor and the enjoyment it brings.
FAQs
1. How long does it take to install an in-ground basketball hoop?
The installation process typically takes two to three days, including curing time for the concrete.
2. Can I install an in-ground basketball hoop by myself?
While possible, it is highly recommended to have at least one helper, especially when lifting the backboard.
3. How much concrete do I need?
Most installations require 10–12 bags of concrete (80 lbs each), but always check the manufacturer’s specifications.
4. How deep should the hole be?
The standard depth is 48 inches, but check your hoop’s manual for precise requirements.
5. Can I install an in-ground basketball hoop in winter?
It is best to install the hoop in warmer weather, as cold temperatures can affect concrete curing.
6. How do I prevent my hoop from rusting?
Apply weather-resistant paint and regularly check for rust spots to extend the life of your hoop.
Conclusion
Installing an in-ground basketball hoop is a rewarding project that adds both value and fun to your home. By following these steps, you can ensure that your basketball hoop is securely installed and built to last. It might take some time and effort, but the result will be a professional-grade basketball setup that your family will enjoy for years to come. With the right tools, proper preparation, and careful attention to detail, you’ll be able to create the perfect place for basketball games in your own backyard. Happy hooping!
More Tools